ESX-8CV CV Expander
If in doubt, ask.
User Manual
Software
Please proceed to this page to download Silent Way v2 and/or the Max/MSP externals.ESX-8CV
Please refer to the image below (click to enlarge):
Installation
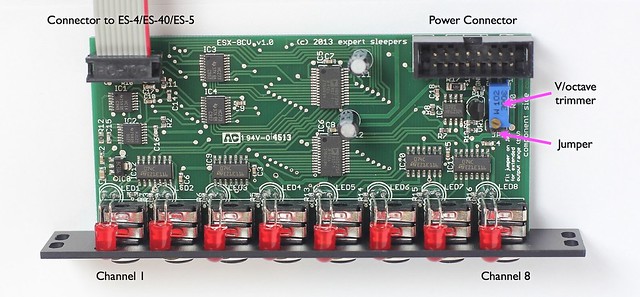
House the ESX-8CV in a Eurorack case of your choosing. The power connector is Doepfer standard. If using the power cable supplied with the ESX-8CV, the connector is keyed and will only insert into the ESX-8CV the correct way round, in which case the red edge of the cable is nearest the edge of the PCB, and carries -12V. ("-12V" is marked on the PCB itself next to this end of the connector.) Be sure to connect the other end of the power cable correctly, again so -12V corresponds to the red stripe on the cable.The ESX-8CV also needs to be connected to an ES-4, ES-40 or ES-5 module. A 10-way cable is supplied with the ESX-8CV. With this cable fitted as shown above, the red strip should be oriented at the other end as shown in the photos in the ES-4 and ES-5 user manuals.
Note: while the 10-way connector on the ESX-8CV may look like the power connector on some Doepfer modules, it is not wired the same. If you connect this to a Doepfer power bus, you will almost certainly fuse the power supply and fry the ESX-8CV. This connector is only to be used for connecting the ESX-8CV to an ES-4, ES-40 or ES-5.
Calibration
The ESX-8CV is factory calibrated for 1V/octave operation. If you need to recalibrate it, or change to e.g. 1.2V/octave operation for Buchla systems, this can be done with the trim pot on the ESX-8CV, the ESX-8CV Combiner plug-in and a voltmeter.The one trim pot adjusts all eight outputs together, so you only need perform the calibration on one output. The procedure is:
- Connect the module to the ESX-8CV Combiner plug-in, with no inputs to the plug-in and all the Offsets set to zero.
- Measure the voltage output. It will be a few mV (unlikely to be more than about 20mV).
- Set the Offset in the plug-in to "1.0".
- Measure the voltage output again. It will now be around 1V.
- While measuring the voltage, adjust the trim pot so the output is exactly 1V plus the offset you measured in step 2. So if the zero output is 10mV, adjust the trim pot so the output voltage to 1.01V.
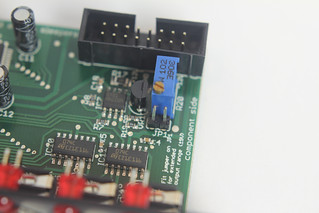
Jumper
There is a jumper on the PCB near the trim pot, which is not fitted by default. (See images below.) With the jumper fitted, the ESX-8CV's range is expanded to approximately ±9.1V, which you may find useful when using the outputs as LFOs, envelopes etc. which typically do not need carefully calibrated voltages. Note though in this case any aspect of the software that assumes the calibrated outputs (e.g. the Voice Controller's default ESX-8CV calibration, and the ESX-8CV Combiner's Offset knobs) will not behave quite as expected.
Without jumper fitted:
With jumper fitted: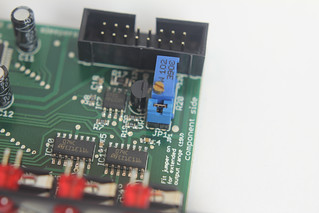
With jumper fitted: